Wednesday, October 23, 2013

It's Halloween! What's a creative way to give out candy?

Ding-Dong!  Trick-or-Treat!  We will soon be hearing at our door steps. 

You've got the pumpkins and maybe some other Halloween decor like ghosts and graveyards but what's a creative way to give out candy this holiday?

- Take a large fish bowl and make a jack-o-lantern face using decals, then fill it with candy (orange wrapped candy will look extra festive)


- Make mini loot bags and decorate the small paper bags with washi tape or get the kids involved and have them decorate the bags the days/weeks leading up to Halloween

- Wrap full-size chocolate bars in white crepe streamers so they look like mummies and add googly eyes - the kids can help too!

- A witch's hat upside down is a perfect spooky bowl for Halloween treats

Try this at Home!

I love doing crafts at home with my kids and they love it too - sometimes their artistic flair takes over and you can find their crayon masterpiece on the walls!

So what do you do - Mr. Clean Magic Eraser does work but you do need elbow grease.

Try spraying WD40 on the 'art' and wipe with a clean rag.  works like a charm but keep in mind WD40 is an oil based product so you will need to use warm water with soap to clean the oil spot but hey, that's better than crayon all over your walls.


Thursday, October 17, 2013

Awesome and simple idea - Bath toys

My kids love their bath time and they love to splash and play!  It gets pretty rowdy and loud but at the end of the bath time when I'm cleaning up, I've noticed that there is always water that gets trapped inside of those cute little toys.  You can really use your muscle to get it out and I've found some pretty yucky black water and you know what that's mold! Plenty of molds are not dangerous but some are and honestly, it's just gross. your toys are probably not so sentimental and special that they are worth saving so maybe you want to replace them and follow this super easy tip...


Here's a super simple idea to help keep your bath toys even cleaner....use a hot glue gun to fill in those tiny little holes.  those hole let in water that can get trapped and create mildew, mold and other spores inside.

Sunday, October 6, 2013

Magic of Make Up

We should always look our best no matter what we are doing or who we are with and it doesn't have to cost a fortune.  Make up is a great way to polish up your everyday look and the secret is to look like you aren't wearing any.  The easiest way to get the natural look is to work with the right tones for your complexion.

If you have fair skin....porcelain, ivory or light golden.  think Emma Stone, Amanda Seyfried and Katherine McPhee.


Look at: 
- Peachy lipsticks (like Shy girl by MAC) or cool pink (like Rimmel London in Pink Chic). 
- Eye shadows in soft pink, beige and light taupe (Smashbox Eye shadow Trio in Multiflash)
- Blush in apricot (Photoready Cream Blush in Pinched), dusty rose and light pink (Boots No7 in Soft Damson)

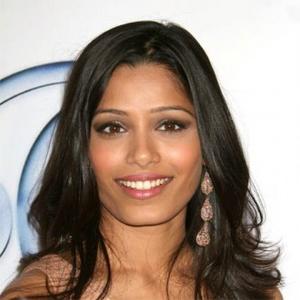
If you have medium skin...honey, light caramel or dark olive...Think Jamie Chung, Rosario Dawson and Frieda Pinto


Look at:
- Warmer tones for the lips like mauve, rose (L'Oreal in Eternal Rose) and warm pink (Sephora Lipstick in scandal)
- Eye shadow should look natural so if you are lighter medium toned go with a light brown shadow like Urban Decay's Buck and if you are darker medium toned try  more golden brown like Joe Fresh Cream eye shadow in Medallion
- Again warm undertones in the bush with complement your skin, golden apricot or rose blush is your best colour palette

If you have dark skin....tan, cinnamon or mahogany...Think Halle Berry, Gabrielle Union, Viola Davis


Look at:
- Berry shades are so flattering like Neutrogena's Lip Balm in Sun Berry but cocoa like Revlon's Enough Buff is a great nude option depending on the look you want. 
- Deep shades in the brown tones but with a plum undertone like Sephora's Western Leather or MAC's Quite Natural might seem to dark but apply it lightly and there will be plenty of definition without too much drama
- Berry and plum tones are best and again apply lightly


Remember no matter your skin tone always...

1. Start with a clean canvas.  Apply a liquid foundation to the face (after moisturizing).  Use you fingers or a sponge to apply and apply concealer to where you need it usually under the eyes, on the sides of the nose and on any dark spots.

2. Bring colour back to the face.  The natural look should  leave a slight flushed look like you just climbed a flight or two of stairs not just ran a marathon.  Try pinching you cheeks to see what a natural blush looks like.

3.  Play up the lips but in a natural tone.  Check out the colour of the inner part of your lower lip to lead you in the right direction.  A shade slightly darker than your natural shade with look the most natural but also the best.  Same goes for the eye shadow, opt for a tone slightly darker than the natural tone.

4. All skin tones should hilight their lashes with black mascara and line upper lash line with black pencil but keep the line thin and a bit smudged so it look like a natural lash line.


Saturday, October 5, 2013

Fall Favourite: Pumpkin Bread

Banana Bread is a favourite in our home, but for the fall season why not give it a twist!

Try pumpkin bread as an alternative.  It works well as a loaf but perfect as a muffin - ideal for school snacks or a quick breakfast!


1 (15 oz) can of pumpkin puree
4 eggs
1 cup of vegetable oil
2/3 cup of water
3 cups of white sugar
3 1/2 cups of all-purpose flour
2 tsp of baking soda
1 1/2 tsp salt
1 tsp of ground cinnamon
1 tsp of ground nutmeg
1/2 tsp of ground cloves
1/4 tsp of ground ginger

1.  Pre heat the oven to 350F and grease three 7 x 3 inch loaf pans.

2.  In a large bowl mix all of the wet ingredients and the sugar.  In a separate bowl, mix the dry ingredients.  Once both are blended, mix them together.

3.  Pour the mix into the prepared pans

4.  Bake for about 50 minutes in the oven.  Loaves are done when a toothpick is inserted into the centre and comes out clean.

5.  Note - muffins will take less than 50 minutes


Friday, October 4, 2013

Turkey Day!

Thanksgiving is coming soon and if you are hosting and maybe a bit nervous (especially if it is the first time) ...don't sweat it!  Here are 10 easy steps to the perfect turkey

1.  Dry brine.  Shower your turkey (make sure it is thawed, you should never season frozen meat) with this mix 2 days prior to cooking. This will season the meat right to the bone.  Kosher salt (1 tbsp per 4 lbs), Chopped fresh herbs (1 tbsp per 4 lbs - mixed sage, rosemary and thyme)  Cover turkey and pan with plastic wrap and chill; flip over after one day.


2.  Tempering.  Remove the seasoned turkey from the fridge and allow it to come to room temperature before you begin roasting - about 2 hours - it is essential for the bird to be at room temperature as that ensures even cooking.  Plus, it reduces it's time in the oven.

3.  Butter is better.  For the pre-oven baste, unsalted butter is preferable to oil for it's better flavour and the beautiful browning.

4.  Don't Stuff it.  For a perfect turkey, stuffing is a bit of a no-no.  It's tough to get the stuffing cooked just right without over cooking the turkey.

5.  High/Low. An initial 30 minutes at 500 F - yes, it's high but it crisps up the skin.  Finish at 350 F for moist tender meat.  Calculate 10-12 minutes per 1lb for your total roasting time.

6.  Breast plate.  The breasts cook faster than the legs.  A foil covering the breast will deflect some heat and help the white and dark meat finish at the same time.  Apply the foil after the skin has browned.

7.  Don't baste.  It's hot and messy and really doesn't add mush to the end result.  Keep the oven closed to maintain a consistent temperature.

8.  Read it.  the only way to tell when a turkey is 100 % done is with an instant-read thermometer.  Insert in the meatiest part of the inner thigh without toughing the bone.  If it reads 165 F - it's done!


9.  Rest up.  A turkey needs a long rest (30 minutes minimum 45 minutes is better) This allows the juices to settle back into the meat and end up in your mouth not on the cutting board

10. Get sharp.  Now that your turkey is picture perfect don't ruin it with dull knives.  A long, sharp thin blade is best for effortlessly carving your bird.


If a full turkey is just too large for your gathering try just roasting a turkey breast.

The traditional sides are great but can be overwhelming so don't be afraid to get creative and try new recipes.

Turkey leftovers are great too - I love a hot turkey sandwich but you can mix it up with a Thanksgiving sandwich or turkey tacos - yum! Re-use the turkey in a casserole dish or a soup.